Sunday, June 23, 2013

DIY Flower Wreath


More Pink Inspiration.  This time in the form of a quick easy DIY project.  It took me a little over an hour to complete 2 of these.

Ian and I moved into a new apartment last month and every time I leave or come into the apartment I see all these lovely decorated doorways.  I have been searching for a fun summer time wreath that I actually like and I still haven't found one.  So I thought to myself...why not make one...it can't be that hard!!

Well not only was this one of the easiest projects I have done, but it was also surprisingly inexpensive.  Always a plus!  While out shopping yesterday with my Mom, we stopped by Joann's Fabric.  We can't seem to stay away from there when we are together.  It can actually be pretty dangerous on our wallets!  We will go in for one project and leave with materials for three!  Yesterday we went in for yarn, my Mom has been crocheting scarves like crazy lately.  Three have shown up on our coat hanger in the last two weeks and it is just the beginning of Summer!

Joann's had a crazy good sale on their Spring Inspiration floral bushes, garlands and stems...70% OFF Entire Stock!!!  So I headed straight to that section as fast as my little feet could carry me.  Oh and did I mention that my Mom had a coupon for an additional 25% off an entire purchase INCLUDING SALE!  Huge score for me.  I do a lot of DIY projects and I refuse to pay full price.

I got enough flowers and 2 18" Grapevine Wreath bases for less than the price of a pre-made one on their wall.  So gather your supplies and lets do this!
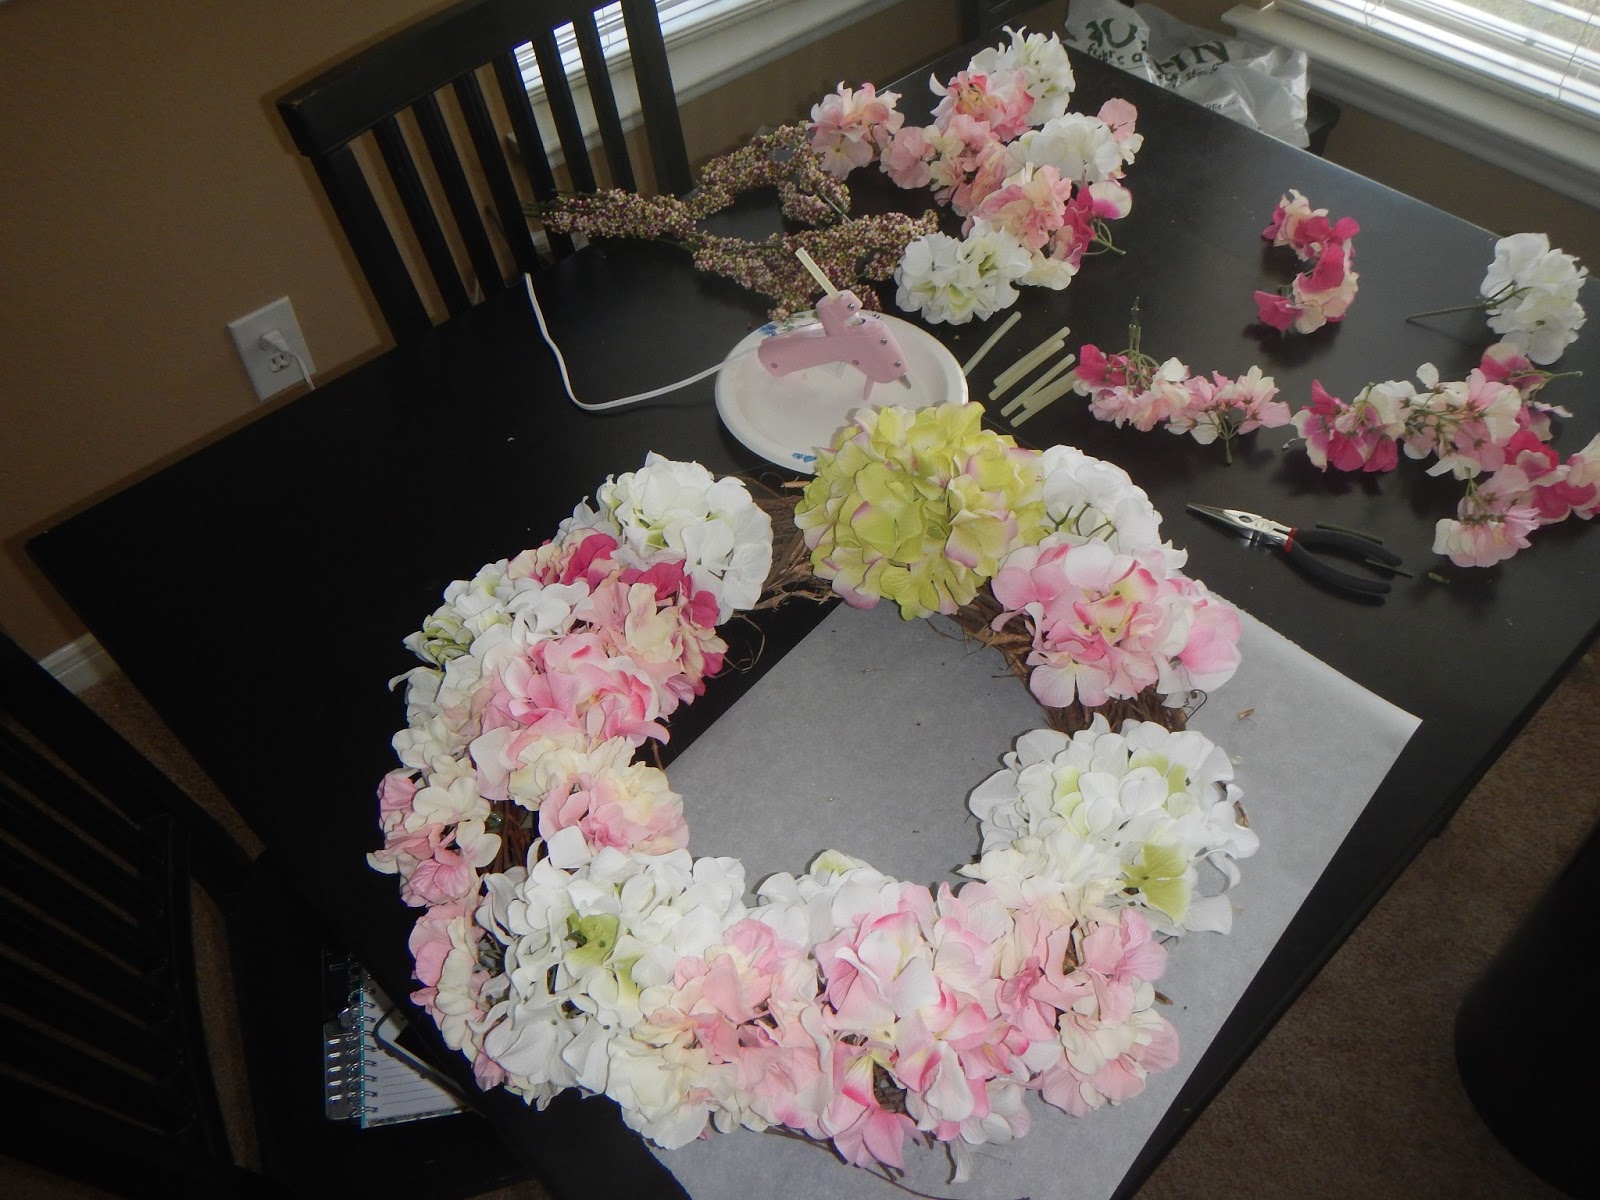
Supplies

  • Floral Stems, Bushes, or Garland (You will need a fair amount of these to cover the entire wreath so the base doesn't show through)
  • 18" Wreath Base (I used a grapevine wreath...however I do believe a Styrofoam wreath would make this project EVEN easier.  But like I mentioned above...I prefer to do things on a budget and the grapevine wreaths were $4.99, half the price of the Styrofoam ones)
  • Glue Gun and a lot of glue sticks! (I probably used 20 short glue sticks)
  • Wire Cutters (This is to trim the flowers)
  • Newspaper or some other material to protect the surface you are working on from the hot glue. (I used parchment paper because that was all I could find)

1) Trim all your flowers off the long stems with the wire cutters.  I left about an inch of stem on mine so they would slide down into the wreath.  


2) Decide how you want to arrange your flowers on the wreath.

3) Put some hot glue on the stem of the flower.  Depending on the type of flower you choose, you may be able to put some on the base of the flower to stick it to the wreath.  I also put hot glue on the wreath where I planned to place the flower.  As you can imagine, it can be somewhat difficult to put and keep glue on the skinny flower stems.  The glue on the wreath ensures you get a good stick so the wind doesn't end up blowing your flowers off.
***FYI:  You WILL end up with hot glue on your fingers OUCH!!***


4) Keep gluing your flowers on until the whole wreath is covered.  Make sure to pick up your wreath and look at it from the angle you would see it hanging as you go.  It is easier to see if one side is fuller than another when you are looking at it straight on like that.  

5) Hang your wreath and Enjoy!


Get Your Pink On...

Happy National Pink Day!  I love the color pink so I decided to celebrate with an easy cheap DIY Wreath some delicious Strawberry Lemonade that has no Refined Sugar!

Let's start with the Strawberry Lemonade.  It will be a nice refreshment while putting the wreath together.  And seeing as how summer has definitely hit Texas, it seems appropriate.  Nothing goes better with summer than lemonade, right?

I always have lemons on hand for my water and ice tea.  So all I needed to pick up was a pint of strawberries.  The lemonade is sweetened with Agave Nectar, which we just recently discovered on our path to cut refined sugar out of our diet.

Agave Nectar is a low glycemic, natural sweetener harvested from the agave plant.  Because of agave's lower glucose content, this sweetener is gradually absorbed into the body helping prevent spikes in blood sugar.  It's delicious sweet syrupy flavor and its easily dissolvable consistency make agave a perfect sweetener for hot or cold drink, sauces and desserts.  This is the one I used today.


This recipe was adapted from
http://www.crunchacolor.com/blogs/news/6362438-strawberry-lemonade-without-sugar-52-new-foods-week-30.
I made a few changes because the original Strawberry Lemonade was a bit too tart for me.  I added extra water to tone it down a bit.  And I forgot to get mint at the grocery store so I left that out.  Here is my adaptation.  

Strawberry Lemonade

About 1 to 1 1/2 CUPS Fresh Organic Lemon Juice (It took me about 9 big lemons)
1 PINT Fresh Organic Strawberries
10 CUPS Water
1/4 CUP Agave Nectar
A Few Sprigs of Fresh Organic Mint

1) Slice the Lemons and squeeze out the Juice
2) Wash Strawberries and cut off the top.  Place them in a blender with 1 CUP of the water.  Puree until smooth.
3) Pour the pureed strawberries into a pitcher.  And add fresh squeezed lemon juice into a pitcher and stir.  (Tip: Add 1 CUP of the Lemon Juice and taste for tartness.  If you like your lemonade really tart go for the full 1 1/2 CUPS)   
4) Add the Agave and Mint sprigs and stir again.  You can add more Agave slowly until you get the desired sweetness.
5) Chill, Serve and Enjoy!!


Coming Soon:
DIY Flower Wreath 
(Pink Themed, Of Course, To Continue Our Celebration Of National Pink Day)


Saturday, June 22, 2013

The Beginning...

Hello and Welcome to Our Life Homemade.  My name is Shanna.  My husband's name is Ian.  And this is our journey to a happy, healthy life full of love.

Please bare with us as we struggle through the beginning of this blog.  This is our first experience with blogging so forgive us as we learn.  We'd love it if you would kindly pass along any Tips or Tricks you have learned along the way to help us out!


We met with a roll of the dice during a random game of Dice With Buddies on a boring Sunday night.  He was in Canada, I was in Texas.  Talk about long distance!  But something clicked and we recently got married.    Ian still works in Canada and I still work in the states.  Luckily he has a job that allows him to work 3 weeks in a row and then be off for a week so we can still see each other.  Hopefully that won't last too much longer!!  Long Distance Relationships SUCK!


We have 2 wonderful furry children and are working on a not so furry one.


Ian was diagnosed with Celiac Disease about 6 years ago so we eat Gluten Free.  I'm still learning a lot about Celiac and cooking gluten free.  Needless to say I have cross contaminated my fair share of dishes, which didn't make the hubby feel to fantastic.  So I recently decided to go completely gluten free as well (not just when Ian was around).  Lots of  homemade, gluten free, clean dishes coming your way!

We also sell Body FX, the only clean, sugar free, gluten free, soy free fitness supplement in the market with NO artificial sweeteners, NO chemicals, and NO fillers!!  Contact us for more information.

We have also recently embarked on the adventure to parenthood.  I have PCOS so that makes it challenging and a bit stressful.  So there is a good chance you will be reading about our experience with IVF.    

I am a DIY and craft queen.  Ian HATES the craft stores but tags along anyway (such a good husband).  So look out for fun and easy projects!  

Thanks for stopping by!  We hope you come again and plunge head first into this beautiful life with us!